
DIY Nilsen Kalkwasser Reactor
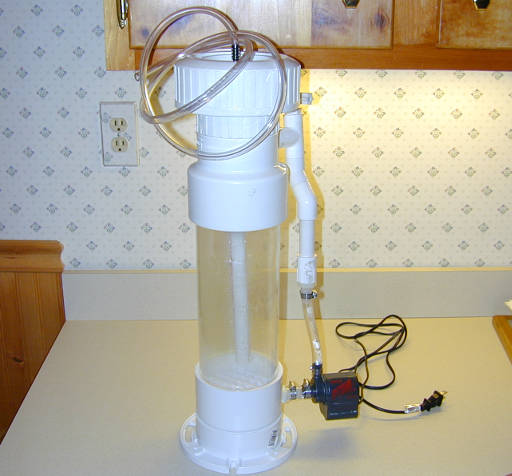
This was my first attempt at constructing a Nilsen Reactor. I converted an old Second Stage from a Calcium Reactor into a Nilsen Reactor. This unit held just over a gallon of water. It used a Maxijet 1000 powerhead to mix the kalkwasser. Notice the white pipe in the center of the unit to direct strong water towards the powder that settles to the bottom. The bottom is rounded to prevent dead spots and kalkwasser powder buildups.
As I learned more about how Nilsen Reactors work it became apparent that not only was this unit undersized for my tank but the mixing pump was way to powerful for this unit.
It would be ideal if a Nilsen Reactor can hold at least one days worth of evaporation to make sure enough kalkwasser is can be dosed.
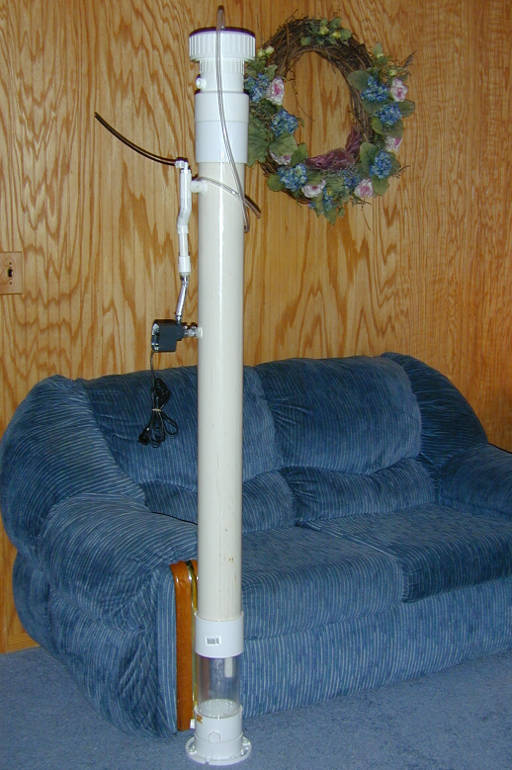
Talk about DIY overkill. I chopped the top off added two 4 inch PVC couplings and used 4 feet of 4 inch PVC pipe to extend the height of the Nilsen Reactor to just over 6 feet tall.
The unit now holds over 4 gallons of kalkwasser, enough to meet my daily needs and the MaxiJet 1000 power-head is enough to power this monster. In hindsight, I should have added a drain valve since the unit is over 40 lbs when full of water and its a long walk back to the sink to empty it.
Water is injected into the unit under pressure via an Infusion Pump connected to the black tubing on the left side. This pushes kalkwasser out the top of the unit at the same rate water is pushed into the unit. I’ve found that a rate of 375ml/hour to 450ml/hour is enough during the winter months but I may need to increase this rate during the summer months when I evaporate more water.
To start off, I added about 10 heaping teaspoons of kalkwasser powder with the 4 gallons of RO/DI water inside the unit. I turned on the mixing pump until I saw cloudy white kalkwasser all the way to the top (the very top has an acrylic window to look down into the unit). I then let the water settle for about 2 hours. That left about 3 gallons of clear kalkwasser and about a gallon of cloudy kalkwasser at the bottom.
I turned on the Infusion Pump, programmed the ml per hour rate and within seconds I had clear kalkwasser exiting the top of the Nilsen Reactor. I used my digital pH probe to test the kalkwasser. The pH meter reported 12.5 which is perfect for saturated kalkwasser.
The benefits of using a Nilsen Reactor are well documented on the Internet. I’ll just rehash what I like about it: It provides pure saturated clear kalkwasser ready to use system in an air-tight vessel to prevent contact with CO2 (the CO2 makes kalkwasser useless). No more hand mixing and siphoning clear kalkwasser and then pouring that into a doser. No more dumping the left over white powder down the drain which greatly reduces the cost of using kalkwasser.
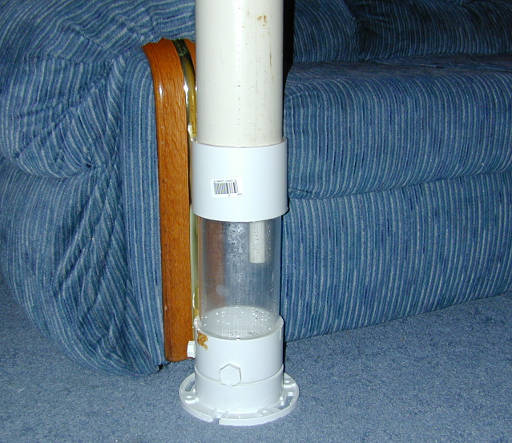
The bottom of the Nilsen reactor is 4 inch acrylic tube which works well with 4 inch PVC fittings. The clear tube allows me to view the mixing process and see how much kalkwasser power is left at the base of the unit. The clear tube also allows me to view the rate at which the cloudy kalkwasser settles to the bottom.
Ignore the two plugs, they are from previous projects. It was cheaper to plug the holes then to rebuild this bottom part.
If this was not a reused part from another project and I was making the unit from scratch, I would have used at least a 2 foot section of acrylic tubing.

On the lower left side of the image you can see the black tube that feeds water into the reactor. The Infusion Pump connects to this tube.
The top part of the reactor is a 4 inch to 3 inch reducer and then a 3 inch PVC union. The union makes a nice removable top. The top plate is made of acrylic to allow viewing down the chamber and it has a 1/4 inch barbed adapter where the clear tubing is attached to. Since the top of the reactor is a lot taller then the tank itself, I drip the kalkwasser into the overflow chamber and not the sump itself.
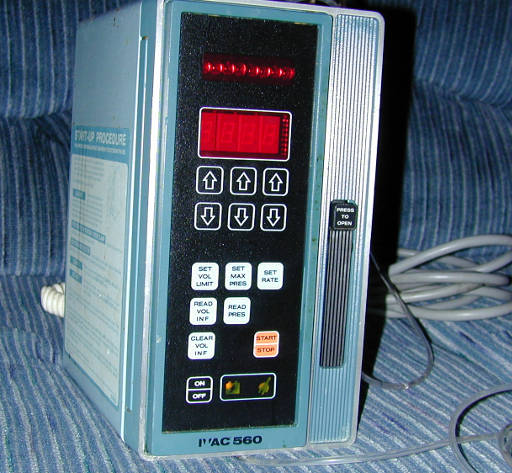
This is the Infusion Pump I use to supply water into the Nilsen Reactor. I got it for about $60 on e-bay. This is a variable pressure, variable flow Perilistic Pump. It is an extermly accurate dosing pump that can dose as little as 1 ml/hour to 999 ml/hour. Fully programable via the front keypads. The unit uses standard medical IV lines which is perfect since my 5 Gallon Kent Aqa-Doser also uses a standard IV drip line.
The unit when operating will show the current drip rate in the large LED display and show how much has been dosed this session in the upper LCD display.
The six up and down arrows are used to program the numeric values on various settings.
SET VOL LIMIT sets how much kalkwasser I need to dose. I usually leave this set at the maxium value and let it dose until it runs out of RO/DI water.
SET MAX PRESS sets the amount of pressure to use on the dosing line, I left the default values for this.
SET RATE sets the dosing rate between 1 ml/hour and 999 ml/hour and this can be changed on-the-fly with no need to reset the unit.
READ VOL INFO will display how much has already been dosed.
READ PRESS will display the current pressure setting.
CLEAR VOL INFO will reset the dosed reading back to zero.
START/STOP and ON/OFF I’ll let you figure it out.
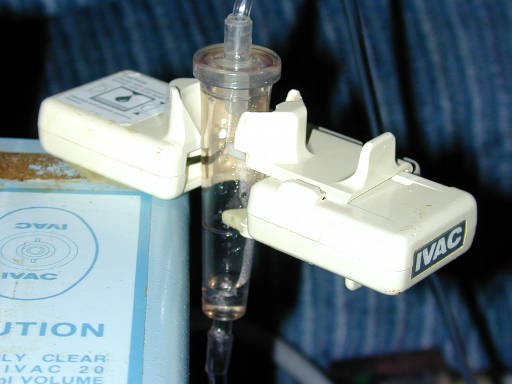
This is the electronic eye the Infusion Pump uses to monitor current dosage rate. The eye is programmed to understand 20 drops equals 1 ml of water. The eye counts the number of drops and checks to make sure the drop rate is in-line with the current dosage rate. If it drips to slow or to fast it will shut down the pump and sound an alarm.
This is way to technical for aquarium use and is more of a pain than anything. False alarms happen at least once a week, sometimes at night. The pump will not work without this sensor so it’s just something I have to live with.
