
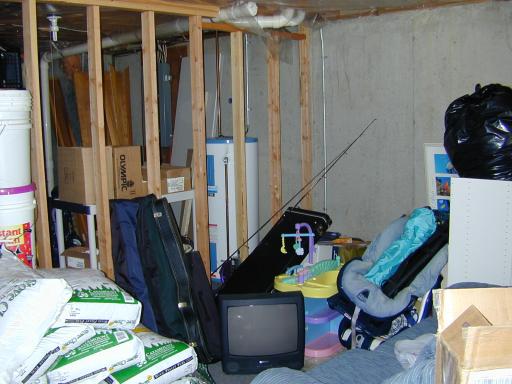
Room Before Construction, December 9th, 2003
This shows the room before any construction had started. This is the basement of my house. Poured concrete walls with a concrete slab floor. The 2x4 stud wall was pre-existing from the previous owner who planned to make a finished basement. The room clutter is mainly stuff left over from the move that has not found a good spot yet. At this stage, I expect to have a few months of work ahead including finishing a design for the room, getting work permits, framing, framing inspection, electrical work, electrical inspection, insulation, insulation inspection, drywall, painting ... In addition I'm expecting a few other side projects such as the installation of a sink area behind where the tank will go. Since the room is below grade, I do not have a window for an air conditioner. I'll also have to plan a significant room ventilation system to help cool the room and prevent mildew from the humidity. |
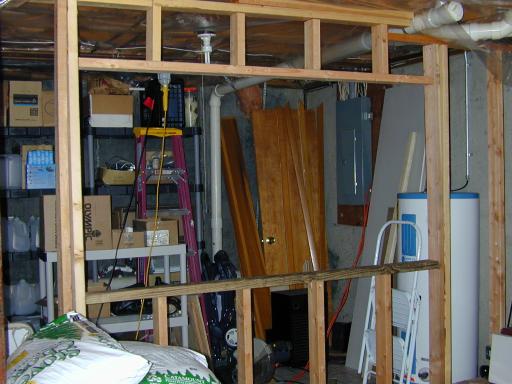
Wall Cutout Completed, December 10th, 2003
At last! The first construction project has been completed. This shows the cut out in the wall where the tank will be placed. This was a fairly simple project just need a good saw and some lumber. The opening is just slightly wider than the tank and tall enough to allow for a door access panel that will be above the tank display to allow access to the tank from this side of the wall (glass cleaning mainly). |
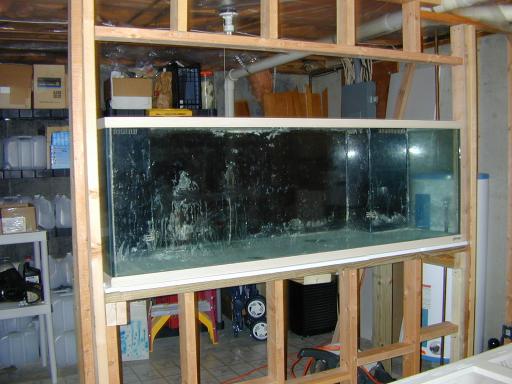
Tank in Place, December 28th, 2003
It took a few days to get enough friends available to move the tank into position. This tank weighs 450lbs dry. The tank is still dirty with sand from when I took it down earlier in the year when I moved to this house. The space above the tank will be for an access door that will flip up to allow tank servicing from both sides of the dividing wall. I now faced a decision to finish working on the tank room or start working on the finished basement area. I really did not like the idea of having the tank running when it came time for sanding & painting so I decided to hold off a bit more on the tank and focus on getting the finished basement framing done. When that is complete and passes inspection, I can then move on to getting the electrical work completed which is the next project. |
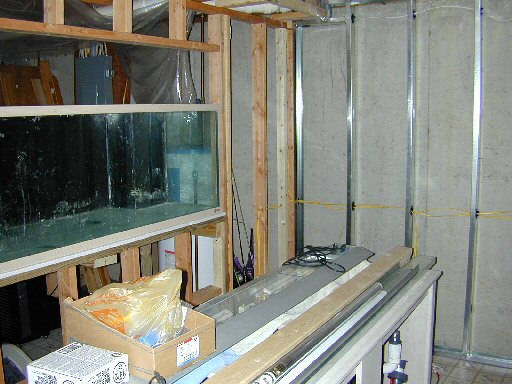
Completed Steel Stud Construction & Wiring, April 23rd, 2004
This picture shows where the original construction and new construction meet. Steel stud construction is about half the price of wood construction and much easier to work with. No loud saws or clouds of saw dust. Just a ruler and a good pair of tin snips. Plastic grommets are used to provide a smooth safe hole for electrical wiring. Light 14/2 wiring can be seen as white wire on top of the wall for the recessed lighting system and heavier 12/2 wiring can be seen mid-wall for the electrical outlets. |
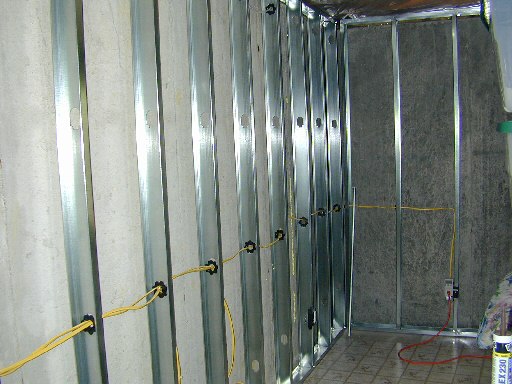
Completed Steel Stud Construction & Wiring, April 23rd, 2004
This picture shows the other side of the reef viewing room with steel stud construction completed. Ignore the floor, that is from the previous owner. The room will be getting a nice carpet when the room is completed. If you always cut the same side of the steel stud beams it is simple to get the wiring holes to line up. The plastic grommets can be seen clearly. |
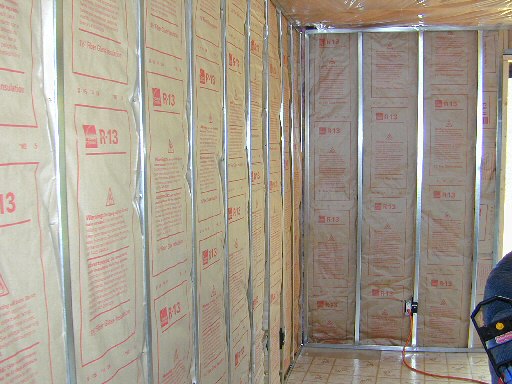
Completed Room Insulation, June 30th, 2004
This picture shows the insulation installed. The room took three large roles of R13 insulation. The insulation is tacked in place with sheet rock screws into the steel stud framing. |
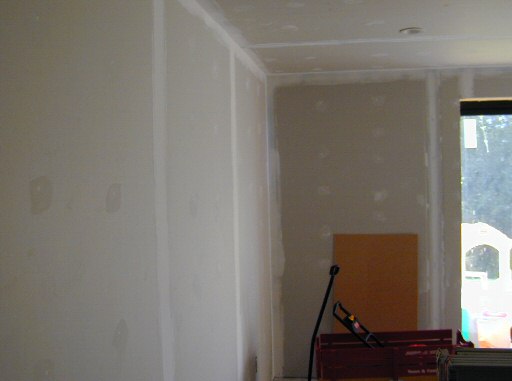
Completed Sheet Rock, Started Taping, August 26th, 2004
This shows the room with the sheet rocking completed. This took a while as it was the first time I have sheet rocked and I did 98% of the room by myself. The seams have been taped and the first layer of compound has been applied. Everything will likely need three to four coats of compound. |
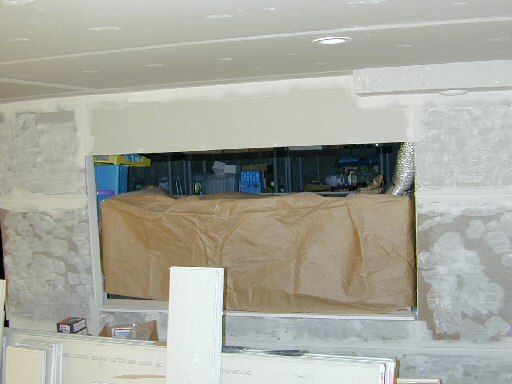
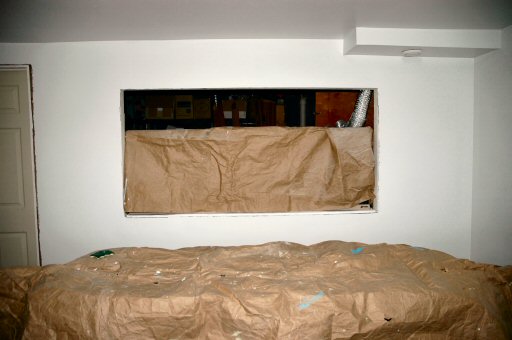
Completed Sheet Rock, Started Taping, August 26th, 2004
This is the wall the tank will be in. The tank is under the brown cover. The cut out is larger than the tank to allow for a door above it. I wanted access to the tank from both sides of the wall. The wall is made of concrete board which is pretty easy to work with, just slightly harder to cut than drywall. The surface of the concrete board is not smooth and needs a skim coat to smooth out. This picture shows part of the first coat applied. |
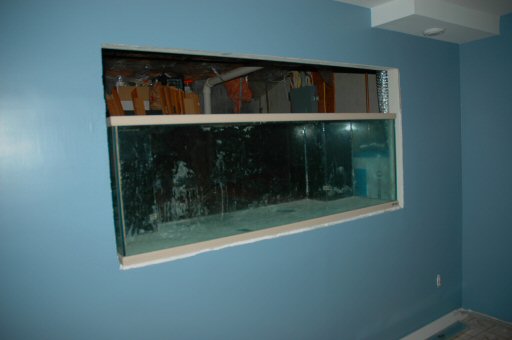
Reef Tank Wall with Primer Completed, January 13th, 2005
A lot of progress has been made since the last set of pictures. Several layers of compound have been applied to skin coat the concrete board nice and smooth with lots of sanding. Then the room had two coats of primer applied. Six panel doors have also been installed to the doorway to the reef room and the storage closet. |
Primer Completed, January 13th, 2005
All the compounding and sanding is complete. Two coats of primer have been applied. Baseboard room heater has been installed. The room is just about ready for the final electrical inspection. |
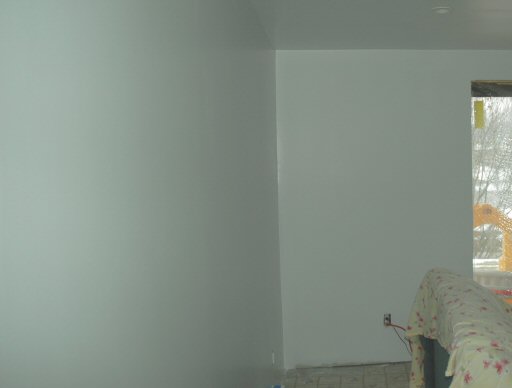
Primary Room Color Completed, January 17th, 2005
Two coats of the primary room color have been applied. The actual color is darker than the image suggests do to the camera flash. The accent colors, trim, molding, etc. still need to be applied. The tank is still dirty from when it was taken down more than a year before. |
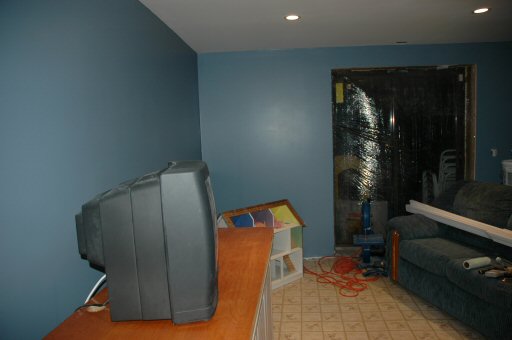
Primary Room Color Completed, January 17th, 2005
The room has been cleaned up significantly to allow the kids to play downstairs while I'm working (the band saw is not plugged in). I placed an old closet door onto of my old reef tank stand for a TV stand until the room is ready for decent furniture. The TV connections are working (both sides of the room). |
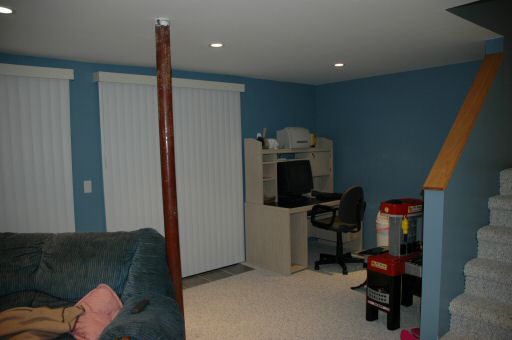
Carpet, Title and Shades Installed, May 21st, 2005
The new room carpeting has been installed. It's a multi-color speckled burber with a light tan base color. In addition floor titles in-front of the twin sliding glass doors has been installed along with shades. Computer desk and children's toys are working there way into the room as well. |
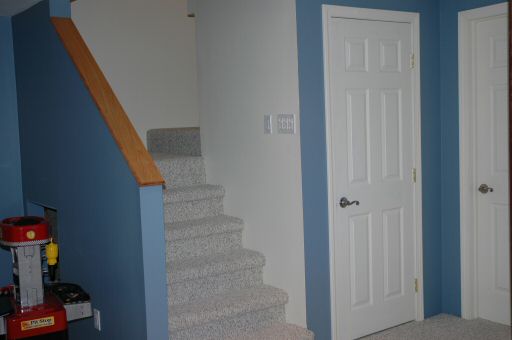
Room Carpeting Installed, May 21st, 2005
Stairway leading down into the reef viewing room, a supply closet and the door way to enter into the reef room. |
Room Carpet Installed, May 21st, 2005
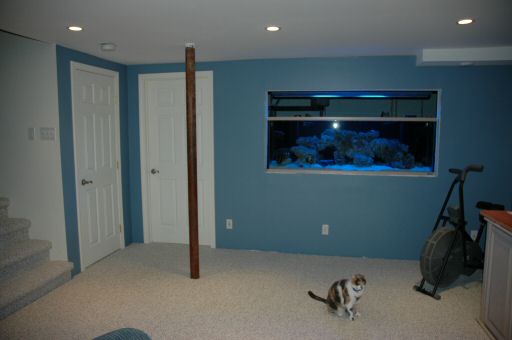
The tank itself still needs to be framed and an access door above the tank needs to be constructed. The lolly-column will be wrapped in oak covering. |
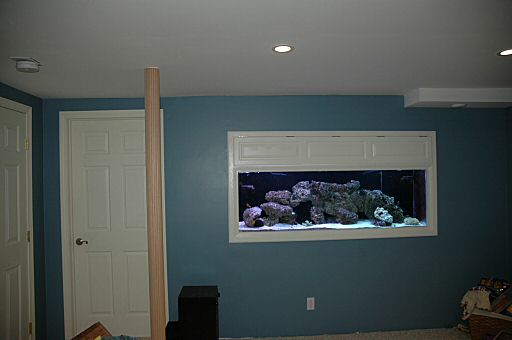
Tank Frame & Trim Completed, September 2nd, 2005
Tank frame and trim with access door installed. This was professionally built custom cabinet carpentry performed by First Cut Custom Woodworks. I was highly impressed by how professional the craftsman are. After taking several measurements they delivered a perfectly color matched unit built to last out of solid Red Oak and Ash that simply slid into place. The lolly-column has also been wrapped in oak. Still needs a clear coat to protect it and a cap installed at the ceiling. |