
Assembling the DIY Light Hood
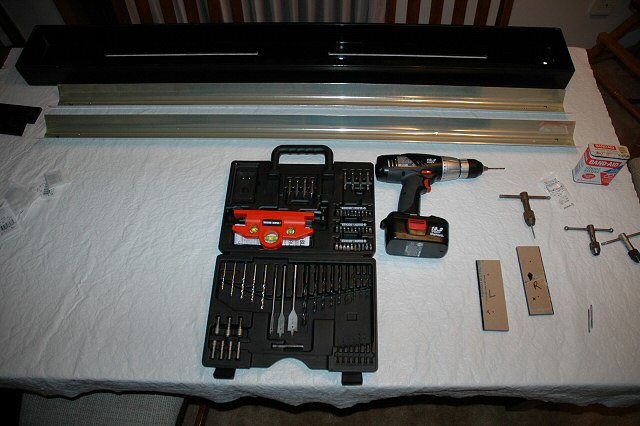
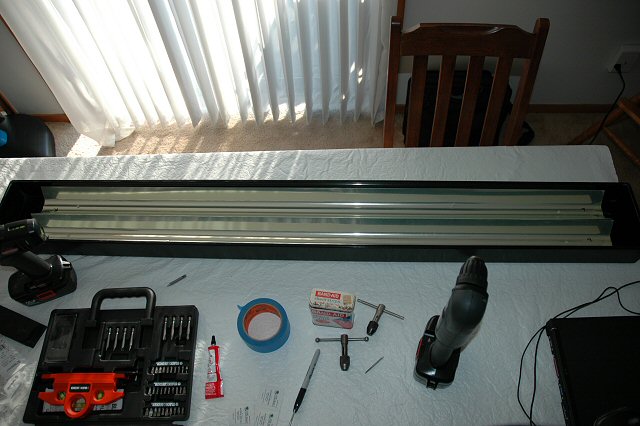
The primary lighting system used on my tank is the AB Aquaspace Lighting System. The main draw back of this lighting system is that it uses only four 24w Power Compact Blue Bulbs for actinic lighting. This is not enough actinic lighting to my eye compared to three 250w HQI bulbs. In looking for solutions to add additional lighting I wanted to reuse an existing IceCap 440 Electronic ballast to power the most light I could. My research concluded that HO (High Output) T5 lighting was the way to go. The most my ballast could power was two 80w T5 bulbs (60 inch length). Pictured here is the collection of parts I needed to complete the light hood. The shell of the unit was hand made and routed by my neighbor who is very handy with Acrylic. It is made from 3/8 inch extruded acrylic. Two SLR (Single Light Reflectors) would be mounted inside followed by end-caps and bulbs. The ballast would be external to the hood. This is not designed to be a guide on working with acrylic or a guide on how to build your own hood. |
SLR Mounting Platform
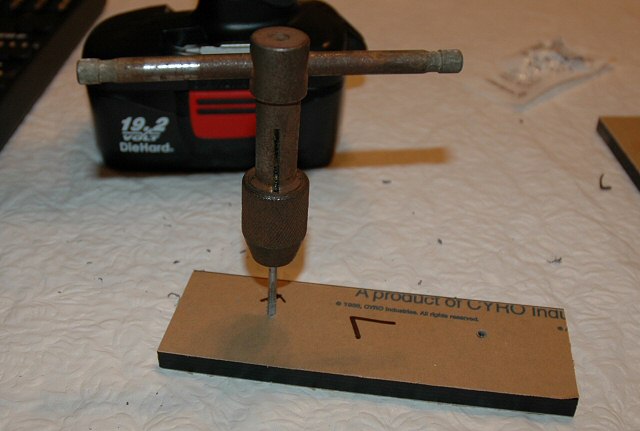
Each of the SLR's (Single Light Reflectors) were pre-drilled with a mounting hole. To allow an air gap between the acrylic hood shell and the SLR I used a small section of 3/8 inch acrylic. The location of the holes were figured out and pre-drilled. Pictured here is a hand-held thread tap which creates the threaded groves the nylon screws will use to hold the SLR in place. I used a #6-32 tap bit to make the threads which match the screws I planned on using (see below). |

#6-32 Nylon Screws as packaged from Home Depot
It took a while but I finally found the location of nylon screws at my local Home Depot store. It is in the "hardware isle" which contains screws, nails and other fasteners. However, of the 100+ draws in this isle, a single unmarked draw had a few different types of nylon screws, nuts and washers. Luckily they are cheap to! Since the hood will not have an acrylic splash guard cover I wanted to make sure I used screws that would hold up to the humid air. |
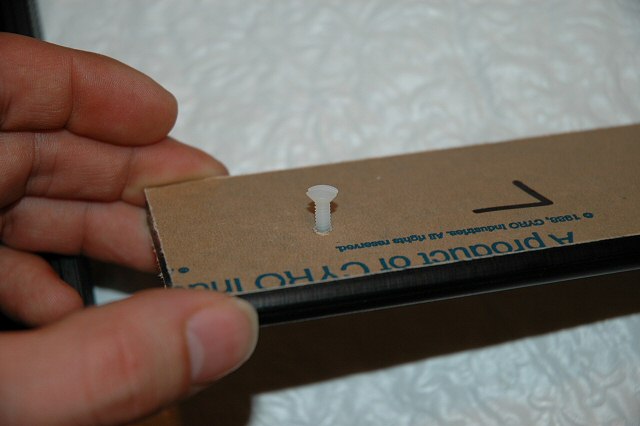
Nylon Screw test fitted to newly tapped 6-32 threads
Pictured here is a test of the thread produced by the tap. Worked perfectly on the first try. I used 3/8 inch nylon screws to hold the SLR to the acrylic mounts as pictured here. Then 3/4 inch nylon screws were used to hold the water-proof end-caps to their mounts. |
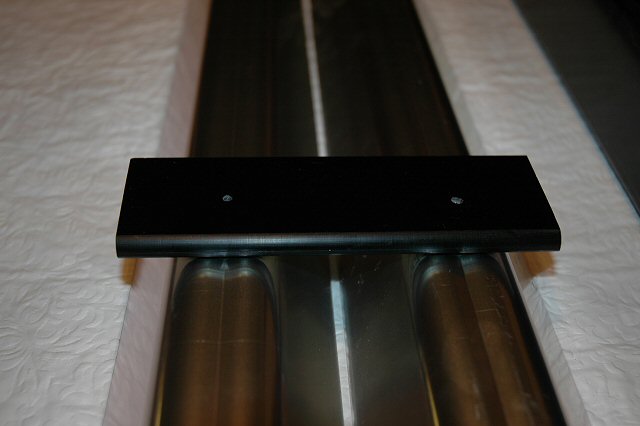
Dual SLR's Attached to Acrylic Mounts
This shows how the two SLR's are attached to the acrylic mounts. There is one mount on each side of the hood. The mounts create a 3/8 inch air gap between the acrylic hood and aluminum SLR reflectors. The acrylic hood has vents routed directly above the SLR's to allow the hot air to escape. |
Dual SLR's Installed in Acrylic Shell
The acrylic mounts are glued in place using Weldon #16 Acrylic Glue, which is a thick gel glue (red tube in picture). The professionals use a glue thin like water applied with needles (the acrylic shell was made in such a way). However the inner parts of the hood are not visible and can be assembled with thicker glues. Remember to always clean the acrylic areas with Alcohol and allow to dry prior to gluing. Once the SLR assembly above was glued in place I carefully removed the SLR's and applied weights to the acrylic mounts to assure a good bond. The glue was allowed to cure for 24 hours. Clamps would have been better, but I didn't have any. |
Acrylic End Cap Mounts
Pictured here are the two end cap acrylic mounts with cutouts to be used to secure the end caps. The end cap will be mounted in the cut out and secured to the side of the cutouts with nylon screws. The assembly of two end caps attached to the mounts will be glued in place with Weldon #16 acrylic glue. |
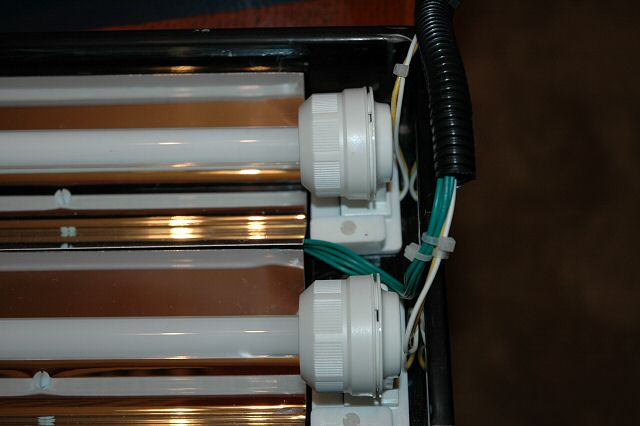
End Caps installed and wired
This shows the end cap mounts installed with attached water proof end caps. The bulbs are installed and final wiring is completed. You can also see they nylon screws used to hold the reflectors in place as well as the nylon screws holding down the end caps. |
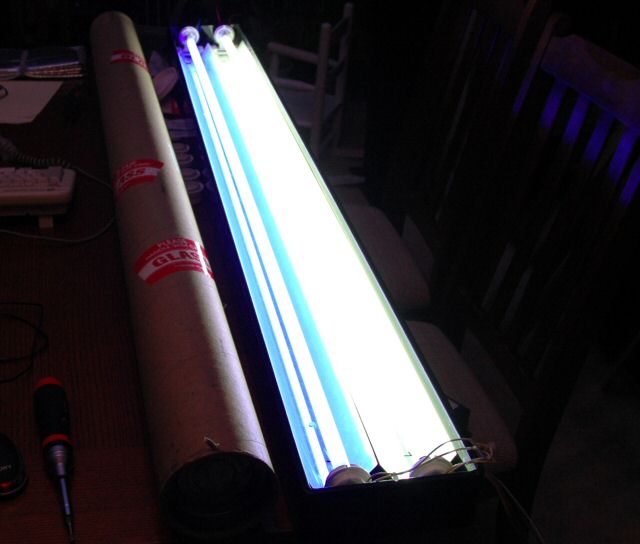
First test of the new fixture
I was very pleased that the unit fired up on the first attempt. Sometimes the wiring on DIY projects can take a few times to get right. The bulb on the left is the actinic blue and the other bulb is the full daylight (much brighter). (This picture was actually taken before the picture above.) |

Completed Unit
The completed unit is pictured here. The last remaining thing to work on is how the light fixture will be mounted over the display. It was hung using thin steel cables. |
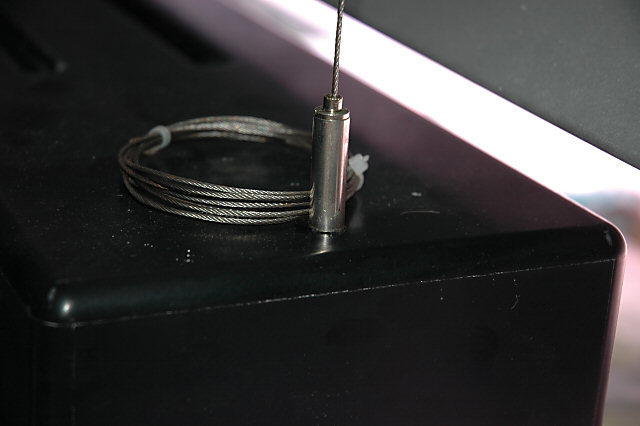
Lighting Fixture Hanger attached
To hang the unit I reused the hanging hardware used on my AB Aquaspace light. While the unit was drilled perfectly centered apparently the weight distribution is off as it required counter weights on one side to hang true and level. |
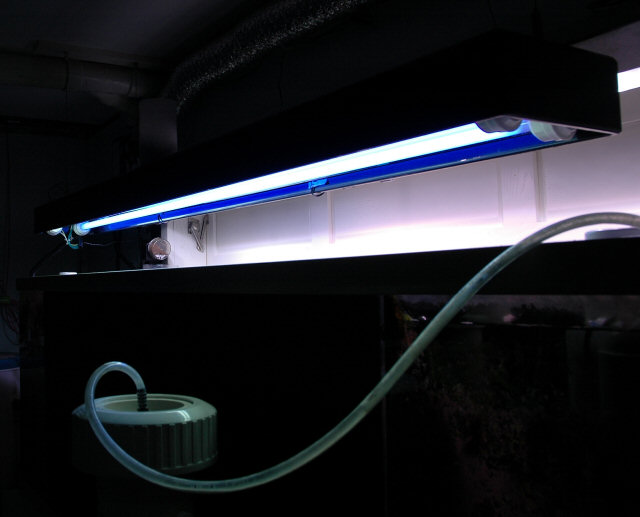
Lighting Fixture Hung Over the Tank
The unit hung and working above the tank. |